The Window Replacement Process Step by Step
What happens at each stage of a window replacement project, from the first quote to the final walkthrough, so you know what to expect.
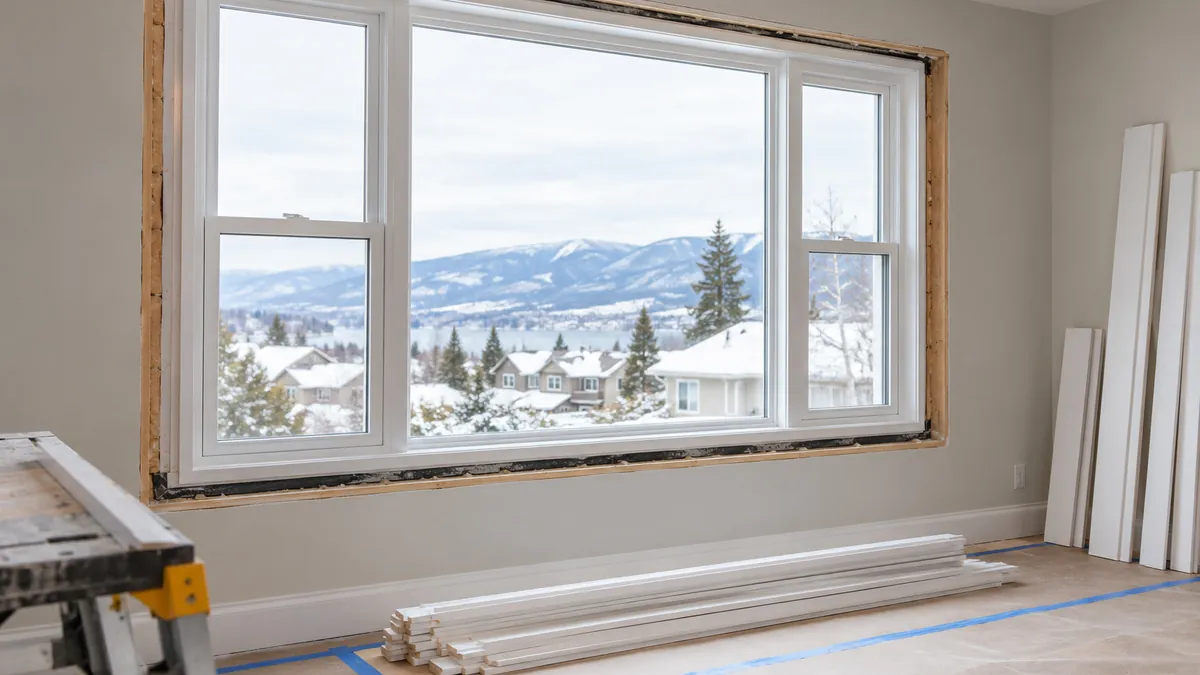
Window replacement is a multi-stage project, not a single transaction. Knowing what happens at each step helps you plan, ask the right questions, and avoid surprises. This guide walks through the process from the first conversation to the final walkthrough.
It is written for Canadian homeowners replacing one window or an entire home, whether insert or full-frame installation.
Stage 1: Define the Scope
Before anyone measures, decide what you want to achieve. Common goals include:
- Fixing drafts, condensation, or difficult operation.
- Improving comfort in specific rooms.
- Replacing failed sealed units or foggy windows.
- Updating the appearance of the home.
- Preparing the home for sale.
- Improving energy performance.
Make a list of the windows that concern you and note the symptom for each: drafty, hard to open, foggy, leaking, or noisy. This list becomes the starting point for the contractor conversation.
Stage 2: Research and Gather Information
Learn enough to ask good questions, but do not try to become an expert overnight. Useful preparation includes:
- Noting window types: slider, casement, double-hung, fixed, bay, or bow.
- Recording approximate sizes and locations.
- Taking photos of each window from inside and outside.
- Noting any damage: rot, cracks, fogging, water stains.
- Considering frame material: vinyl, wood, aluminum, fibreglass.
- Considering glass options: double or triple glazing, Low-E, argon fill.
- Thinking about budget and whether to do all windows at once or in phases.
Read our guide to window energy ratings for background.
See our window replacement cost guide for pricing context.
Stage 3: Choose a Contractor
Get two or three local quotes for the same written scope. A good contractor should:
- Visit your home and inspect the windows and openings.
- Measure each opening, not just rely on your numbers.
- Ask about your goals and priorities.
- Explain insert vs full-frame options and which fits your situation.
- Provide a written, itemized quote.
- Explain warranties for product and workmanship.
- Be properly insured and able to provide business details.
Do not choose based on price alone. A contractor who will not inspect in person or will not put the scope in writing is a reason to look elsewhere.
Stage 4: The Quote and Product Selection
The contractor should provide a written quote that separates:
- Window unit: brand, model, material, colour, size, configuration.
- Glass: type, coating, gas fill, ratings.
- Frame: insert or full-frame.
- Installation: removal, setting, sealing, flashing.
- Hardware: locks, handles, hinges.
- Trim and finishing: interior and exterior.
- Disposal: old units and debris.
- Permits: responsibility and fees.
- Warranty: product and workmanship terms.
- Taxes: included or extra.
At this stage you choose the actual products. Consider:
- Climate zone and Energy Star qualification.
- Window orientation and room use.
- Frame material and maintenance preferences.
- Glass performance for heating or cooling dominance.
- Security needs, especially for ground-floor windows.
Stage 5: Permits and Scheduling
Confirm whether a permit is required for your project. Read our guide to permits for window and door replacement for context. If a permit is needed, confirm who obtains it and whether the fee is included.
Once the quote is accepted, schedule the work. Consider:
- Lead time for custom or special-order windows, which can be weeks or months.
- Season: spring and summer are busy; fall often has good availability.
- Whether you want all windows done at once or phased.
- Your household schedule and tolerance for disruption.
Confirm the start date, expected duration, and what happens if windows are delayed.
Stage 6: Prepare Your Home
Before the crew arrives:
- Move furniture and breakables away from windows.
- Remove curtains and blinds from the openings.
- Clear sills and floors around each window.
- Protect floors along the work path.
- Arrange for pets and children to be away from work areas.
- Plan for windows to be open to the outside during installation.
Read our guide to preparing for installation day for the full checklist.
Stage 7: Installation Day
A typical installation day follows this sequence:
- Crew arrival and setup: floor protection, material staging, scope review.
- Removal of old windows: sashes, frames, and trim as applicable.
- Opening inspection: check for rot, damage, or issues hidden by the old unit.
- Opening preparation: cleaning, levelling, flashing, and sealing details.
- New window installation: setting, shimming, levelling, and securing.
- Insulation and sealing: filling gaps between frame and opening.
- Hardware and trim: locks, handles, weatherstripping, interior and exterior finish.
- Cleanup: debris removal and work area cleaning.
- Walkthrough: operation demonstration and scope review with you.
For insert replacement, the existing frame stays. For full-frame replacement, the old frame is removed and a new one installed, which is more invasive and may touch siding, drywall, or flooring.
Stage 8: Inspection and Walkthrough
Before the crew leaves, check each window:
- Open and close fully. Operation should be smooth.
- Lock and unlock. Latches should engage without force.
- Check for even gaps around frame and sash.
- Confirm weatherstripping seals when closed.
- Inspect interior and exterior trim.
- Verify weep holes and drainage are clear.
- Ask about any remaining touch-up work.
- Confirm warranty paperwork and care instructions.
Report issues immediately rather than waiting until after the crew leaves.
Stage 9: Final Payment and Paperwork
Pay according to the agreed schedule. Avoid paying the full amount before work is complete. Keep:
- The signed contract and quote.
- Warranty documents for product and workmanship.
- Product labels and model numbers.
- The invoice and proof of payment.
- The contractor's business and insurance details.
Store these together. You will need them for future claims or if you sell the home.
Stage 10: After Installation
In the days and weeks after:
- Operate each window daily for the first week.
- Watch for settling, new gaps, or operating issues.
- Follow manufacturer cleaning and maintenance instructions.
- Keep tracks and drainage clear.
- Check exterior sealant after the first season.
- Note any condensation patterns in the first winter.
A well-installed window should operate smoothly and seal tightly from day one.
Staging the Work
If you are replacing several windows, consider the order:
- Leaking, damaged, or unsafe windows first.
- Windows in the most-used rooms next.
- Windows with failed seals or poor operation.
- Windows causing comfort or noise problems.
- Remaining windows as budget allows.
Ask for both a whole-home price and a phased price so you can compare savings versus convenience.
Common Issues and How to Handle Them
Hidden damage: Rot or water damage found after removal. The contractor should stop, show you, and price the extra work before proceeding.
Delayed windows: Custom units can arrive late. Confirm whether the installation date is firm or provisional.
Weather delays: Rain or extreme cold can pause exterior sealing. Ask how openings will be protected.
Operating issues: A window that sticks or will not lock after installation should be reported immediately.
Frequently Asked Questions
How long does window replacement take?
One window may take a few hours. A whole-home project often takes several days. Ask for a schedule.
Do I need to be home?
It is best to be available at the start and end of the day for questions and the walkthrough.
Will my home be cold during installation?
Openings are covered or closed at the end of each day. Individual openings may be exposed briefly during work.
Can I replace windows in winter?
Yes, with proper protection of openings. Sealants need suitable conditions, and delays are more likely in extreme cold.
Do I need a permit?
Like-for-like insert replacement often does not require a permit, but changing the size or structure may. Confirm with your municipality.
What if I find a problem after installation?
Contact the contractor promptly. Issues are easier to resolve when reported soon after the work.
Replacement Cost Expectations
Window replacement costs vary widely by unit, method, and region. Treat any figure you see online as a planning range rather than a quote.
As a general planning guide:
- Single insert window: usually the lowest-cost option per unit.
- Full-frame replacement: a higher cost per unit, because it includes a new frame and finishing.
- Whole-home project: often a lower per-window price because setup and access are shared.
- Custom or oversized windows: cost more and have longer lead times.
- High-performance glass: adds cost but can improve comfort and reduce heating load.
- Hidden damage repair: variable, and can rise if rot or water damage is found.
Ask for a written quote that separates units, installation, trim, disposal, permits, and labour. A realistic budget includes a contingency of roughly 10 to 15 percent for hidden damage, especially in older homes.
Working With Your Contractor Through the Process
A good contractor will:
- Guide you through each stage, from scope and product selection to installation and warranty.
- Inspect each opening and measure on site before ordering.
- Explain insert vs full-frame and recommend the method that fits each window.
- Provide a written, itemized quote and a clear schedule.
- Verify each window operates, locks, and seals before moving on.
- Leave the home weather-tight at the end of each day.
If a contractor rushes the process, will not measure on site, or will not put the scope in writing, get another quote.
Replacement Process Quick Reference
- Define your goals before anyone measures.
- Get two or three local quotes for the same written scope.
- Confirm permit responsibility and fees before work starts.
- Prepare your home: clear work areas, protect floors, arrange for pets.
- Check each unit operates, locks, and seals before the crew leaves.
- Keep contract, warranty documents, product labels, and receipts together.
- Operate each window daily for the first week after installation.
- Consider leaking or most-used windows first when phasing.
How long does window replacement take?
One window may take a few hours. A whole-home project often takes several days. Ask for a schedule before the work starts.
Can I replace windows in winter?
Yes, with proper protection of openings. Sealants need suitable conditions, and delays are more likely in extreme cold.
How long does window replacement take?
One window may take a few hours. A whole-home project often takes several days. Ask for a schedule before the work starts.
Can I replace windows in winter?
Yes, with proper protection of openings. Sealants need suitable conditions, and delays are more likely in extreme cold.
Do I need a permit?
Like-for-like insert replacement often does not require a permit, but changing the size or structure may. Confirm with your municipality.
How long does window replacement take?
One window may take a few hours. A whole-home project often takes several days. Ask for a schedule before the work starts.
Can I replace windows in winter?
Yes, with proper protection of openings. Sealants need suitable conditions, and delays are more likely in extreme cold.
Do I need a permit?
Like-for-like insert replacement often does not require a permit, but changing the size or structure may. Confirm with your municipality.
What if I find a problem after installation?
Contact the contractor promptly. Issues are easier to resolve when reported soon after the work.
Next Steps
Understanding the process helps you manage it confidently. Windoorly can walk you through each stage, from scope and product selection to installation and warranty.